Product Photography A Beginners Guide
Product photography is a category of photography that illustrates a product in advertising in the most appealing way possible. This form of photography is used to optimise many websites or catalogues to a well-read and professional standard, as professionals who understand the procedure, use the right lighting, setup materials and editing techniques as part of the job. Commercial photography is a term or category that refers to marketing and advertising as its intention is to sell a product or service. Lifestyle, Food, Architecture and Portraiture are also key areas that fall under this category.
SETTING UP FOR PRODUCT PHOTOGRAPHY
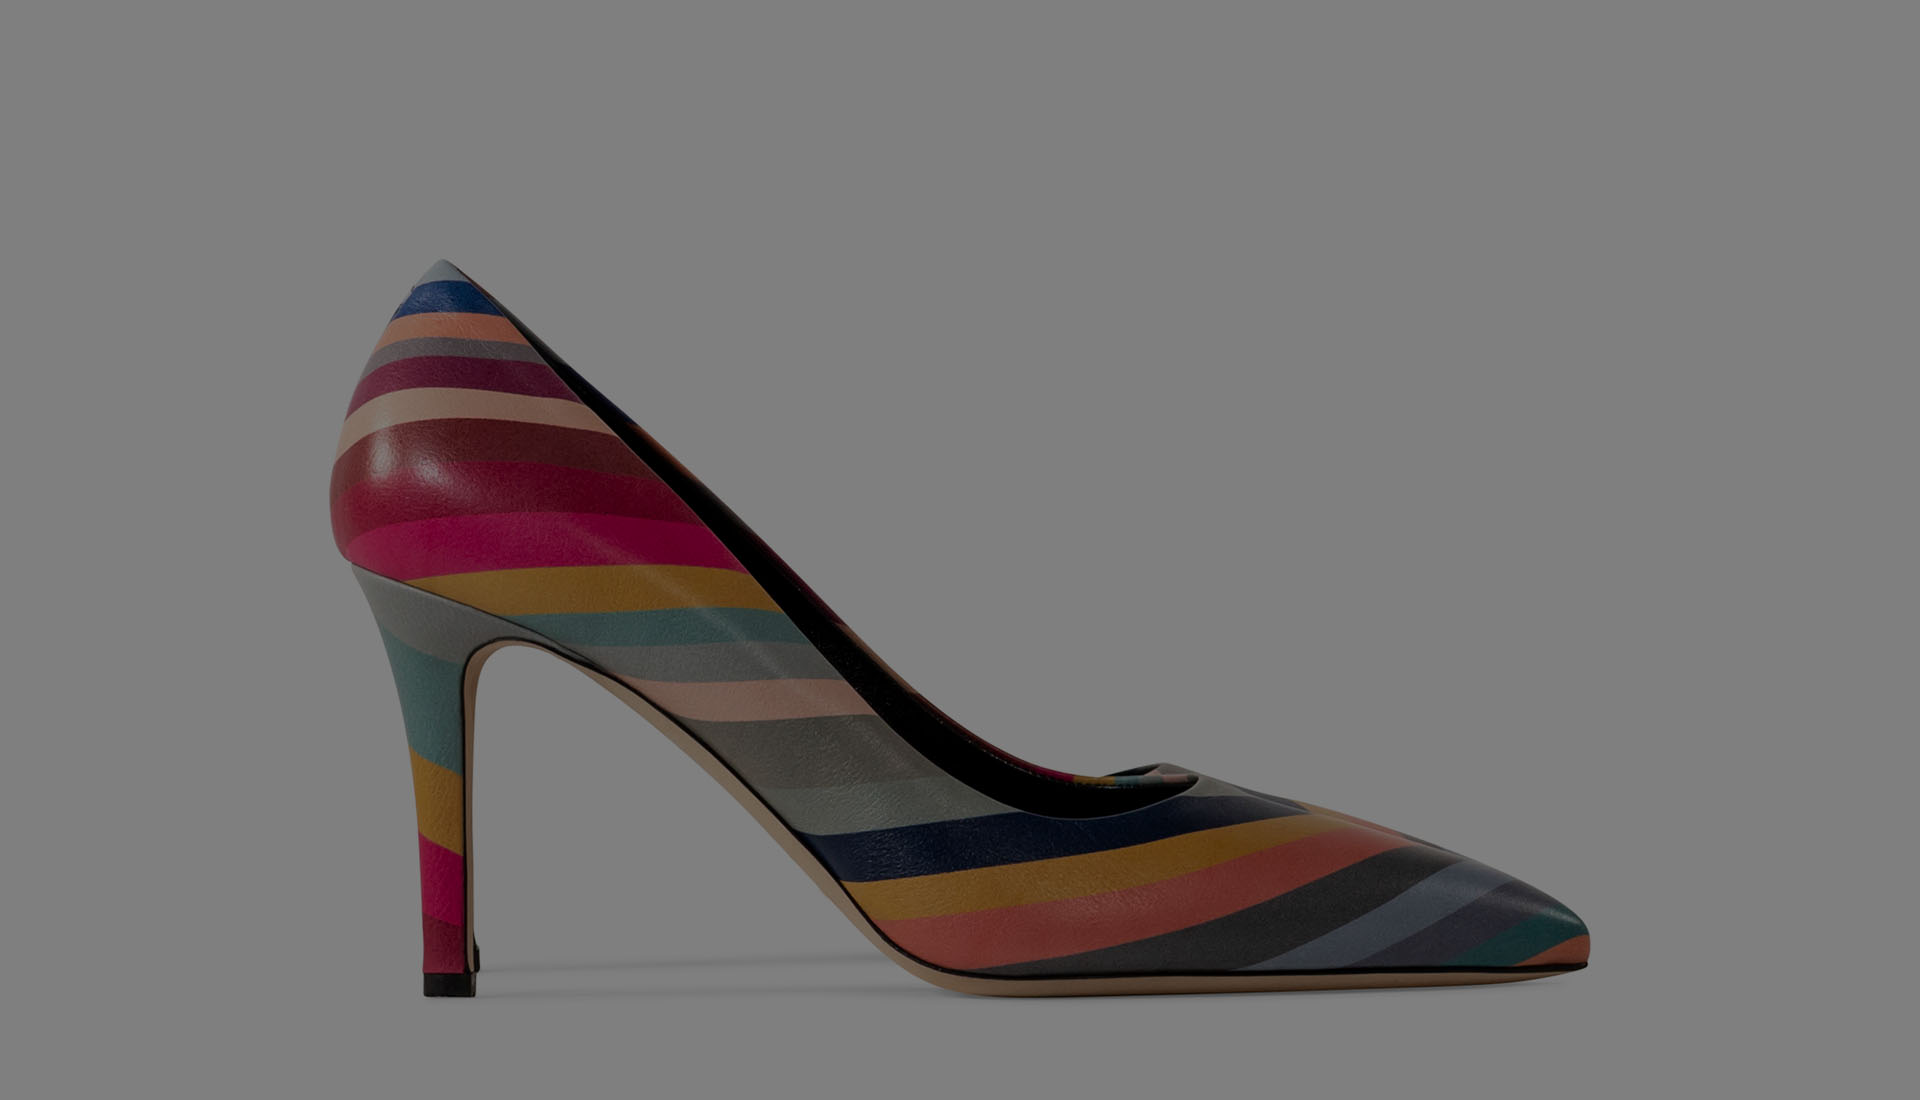
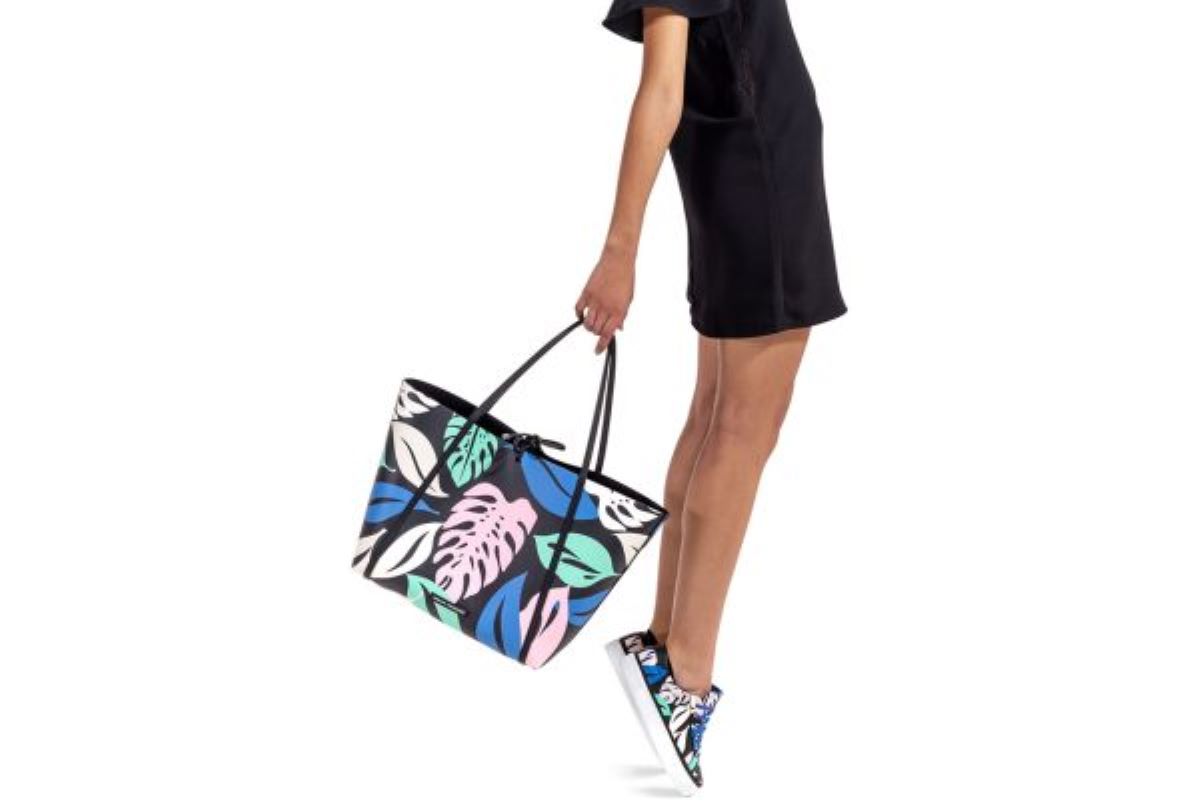
Setting up the right background is crucial to any product photography shoot because it sets the tone and it simplifies the entire editing process. Using a white or light backdrop would be easiest for the shoot as it would make the product stand out and simplifies post-production editing.
There are many ways you can improvise a backdrop (on a tight budget), by using a chair or table you can make-shift a shooting table by draping craft paper as a curve over the chair or even building a light tent out of some cardboard and paper scraps. A light tent is a box device with light, translucent walls designed to evenly disperse the light of the object, in this case, the product, being photographed. It is important to set up your product on a flat and stable surface, in front of your background.
If you’re shooting items larger than your average perfume or shampoo, you’ll need to create a larger/broader backdrop, which might cost slightly more. But you can also improvise by using sheets or more craft paper, taping them to the wall so they evenly drape down to the ground. This is exactly the same as the makeshift shooting table, only on a larger scale.
Once you get the light right, you’re almost ready to shoot.
USING THE RIGHT AND BEST LIGHTING FOR PRODUCT PHOTOGRAPHY
The quality of your image is definitely defined by the lighting you use. Lighting can be a dreary process to set up but when it’s done right, it can simplify your post-production process and brings beautiful results on the shoot.
On a tight budget, NATURAL LIGHT is best to use and easy to manipulate in-house. This saves you money, time and hassle. Set up close to a large window that allows lots of light into the room. If the light is too harsh you can defuse it by using a piece of cloth or white paper over the window. It is always best to shoot when the light is at its brightest. The more light you have, the more you can play and you can always minimise it rather than not having enough. Keep in mind to never shoot with direct sunlight as it creates harsh shadows.
STUDIO LIGHTING is a tad more expensive but can still be manageable under a tight budget. You don’t need the top quality studio lights worth thousands. You can get by with basic lamps with strong bulbs and cheap softbox setups. You can place some white paper or cloth over the lights to create the same effect as a softbox – this will help you achieve softer shadows. One of your lights should serve as the main/key light and the other as your fill light/backlight (depending on your desired outcome) but you can really use the element of play when you’re setting up.
Your key light is typically placed in front, facing your setup slightly from the side, while your fill light is there to lighten the shadow areas. You can also add an additional backlight on the opposite side, back or even above. The point of the fill light is to even out the shadows and soften the harshness. This is also what light-boxes are designed to do; to diffuse and distribute light evenly over and around the product. Once you’re happy with your setup you can start shooting have consistent and professional results.
USING A TRIPOD
A decent tripod will serve you for many many years. You can in fact get one on a tight budget but if you’re really serious about your photography game, I’d recommend investing in a more expensive tripod as it would be more stable and the quality stronger. Shooting with a tripod, set your camera to a lower aperture or a higher f/stop and slow your shutter speed. This will give you a wide depth of field, naturally keeping the product in focus, leaving you with a crisp image. Stabilising your camera and shooting with a wide depth of field when shooting is vital to get the best image possible and avoiding blurry images. A decent tripod will serve you for many many years. You can in fact get one on a tight budget but if you’re really serious about your photography game, I’d recommend investing in a more expensive tripod as it would be more stable and the quality stronger. Shooting with a tripod, set your camera to a lower aperture or a higher f/stop and slow your shutter speed. This will give you a wide depth of field, naturally keeping the product in focus, leaving you with a crisp image. Stabilising your camera and shooting with a wide depth of field when shooting is vital to get the best image possible and avoiding blurry images.
RETOUCHING / POST-PRODUCTION
Retouching your images post-shooting is crucial to achieving the spotless image you aspire to create. Even if you shoot with a smartphone, editing can make or break the professional results you’re looking for. For our newcomers, if your lighting or setup didn’t go exactly as planned, you can still salvage your shots by making those small errors disappear in ‘post’. Retouching covers anything from spot removal to changing the background entirely. It is a time-consuming process especially if your just getting started and don’t have enough experience yet. A bit of advice would be to learn your shortcut keys as soon as possible, when you have those down, you have so many possibilities at your fingertips. Get in touch today!
We are a Creative Content Production Agency specialising in Video Production, Photography, Graphic Design, eLearning Development, Web Design, Animation and Creative Consultation. | info@oliverkarstel.co.za | www.oliverkarstel.co.za | IG.com/oliverkarstel